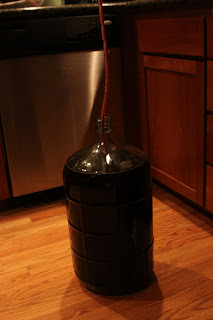
Because this is my most adventurous creation..I finally had enough motivation to start writing this stuff down. Sorry for the lame intro - but welcome!
I like wine. Correction: I LOVE WINE. And what better thing for a foodie like me to do but to make some wine of my own? Well...the real goal here is to try the easy kits first and then hopefully crushing my own fruits to make some wine...and hopefully by that time I will have moved to Italy to work on a vineyard and I'll be set. :)
I got a complete
wine making kit from a lovely wine shop in Mt. Vernon. (If you haven't been to Mt. Vernon or La Conner, I highly suggest you pay a visit in the spring or summer. La Conner hosts the annual Tulip festival every year, and to say the least, the flowers are incredible)
The Wine: Vintners Reserve World Vineyard Collections - A California Zinfandel and Shiraz blend: Which makes six gallons of wine (approximately 30 bottles - have fun getting those empty bottles!).
I went to a wine making demonstration a few weeks ago thanks to Dorcas Toombs, who owns
My Own Vintage, a small shop that makes you feel right at home. It's sort of one of those places that makes you feel like you've been friends with the owners for years and you're just all hanging out drinking and learning about wine together. Love it. So my roommates and I had somewhat of an idea of what we were doing. Making your own wine was pretty intimidating for me, and watching the little intro DVD that came with our kit didn't help my confidence either.
1. Sanitizing your equipment
This is where things already started to go wrong for me. The real first step is to unpack EVERYTHING in your wine kit and lay it out in front of you and try to determine what each ingredient is know when you are going to need it. Long story short: There were two different packets called Metabisulphite...and apparently one was Potassium Metabisulphite and regular Metabisulphite. Well..since we failed to unpack EVERYTHING...we didn't see there were two different packets. And proceeded to mix the wrong Metabisulphite package with water to sanitize our equipment.

So needless to say we had to dump it out. The good news is we learned that we don't need the Potassium Metabisulphite for another couple of weeks. So hopefully I can get that replaced before we need it.
SO - the real first step is to sanitize all our equipment by spraying it down with a mixture of Metabisulphite and water.
2. Ensuring our primary fermenter is capable of holding 8 gallons

We filled our carboy (giant glass jug) with water (about 6 gallons) and poured it into our primary fermenter so that we could make a 6 gallon mark on the primary fermenter.
3. The part where everything gets mixed

Next, we stirred two litres of hot water and the packet of Bentonite together at the bottom of our fermenter. Meghan had to stir pretty vigorously because that's what the DVD said to do...and we had a good laugh about it because the DVD was pretty cheezy.
Anyway, the next part was pretty scary, pouring the juice into the fermenter. It was pretty heavy and at the last demonstration we saw there was some spillage and I'm sure intense grape juice stains. But it was fun.

Then we added some water to flush out what was left in the juice bag and filled the fermenter until it reached our six gallon marker from earlier. Pretty simple.

Looking good!
4. The not so simple part (for non-math folk like myself)
This was the tricky part because it required learning some terminology. Using a wine thief (similar to a really large syringe pipe), we took a sample of the wine and poured it into what I think is basically a graduated cylinder, so that we could measure the gravity. Each wine has a different gravity measure, which wasn't too hard to figure out since it was in the instructions. The tricky part was trying to figure out how to read the hydrometer...Meghan and Troy had to team up for this one.


After much debate, we decided it was ready! We added some oak chips and took the temperature of the mixture to make sure it was right before we added any yeast. Once we added it, we were ready to store it. We could hardly wait we almost sampled it! :)


I made this two days ago, and in a few more days I'll be ready to move it into the carboy..which will be really interesting...
Until then - happy eating!


